

Make Your Computer Talk using IBM Watson
Using the IBM Watson Text To Speech API to synthesize speech from text in many different languages.

“Once a new technology rolls over you, if you're not part of the steamroller, you're part of the road.” -Stewart Brand, Writer
Objectives
At the end of this article you should be able to:
Access the IBM Watson Text-to-Speech API.
Synthesize speech from a sentence.
Synthesize speech from a text file.
Synthesize speech from text in a variety of different languages.
IBM Watson is a PAAS that is used to develop, deploy and scale AI-powered applications. Today we are going to use Watson to synthesize speech.
Before we begin I'll give a light introduction to what text-to-speech synthesizing means.
Below is a picture of a robot holding up a book

Text-to-speech (TTS) is a type of assistive technology that reads digital text aloud. It's sometimes called “read aloud” technology. In simple words, it is a technology that helps you make your computer read out loud.
Before we begin the project let's look at
The Prerequisites for this Article
- Knowledge of python and use of pip
- Internet connection.
- An email address.
- A text editor or Jupyter notebook.
You also need to have an IBMID, if you don't have one, click here to get one. getting an IBMID is essential because we will be using the IBM text-to-speech API to build our software if you have never used a PAAS don't fret I'll walk you through it.
Now you have gotten an IBMID let's...
Get our API Key
Below I'm going to explain how we are going to get our API Key for the project
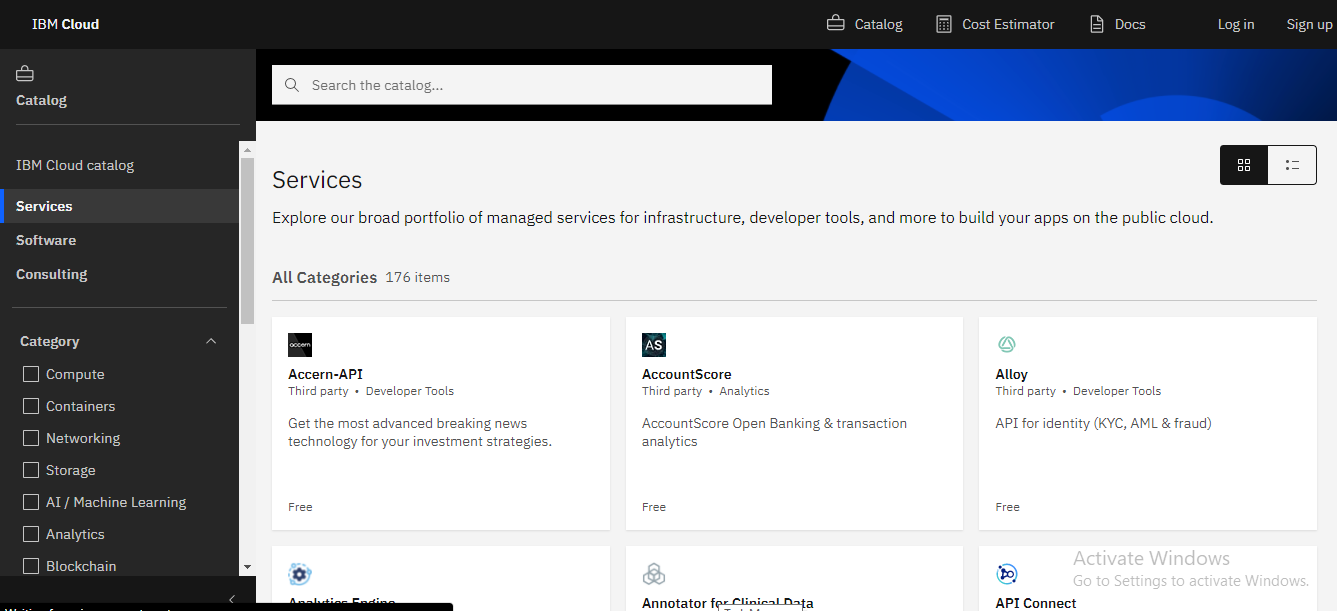
First": You go to the IBM Cloud Catalog
below is the IBM catalog landing page
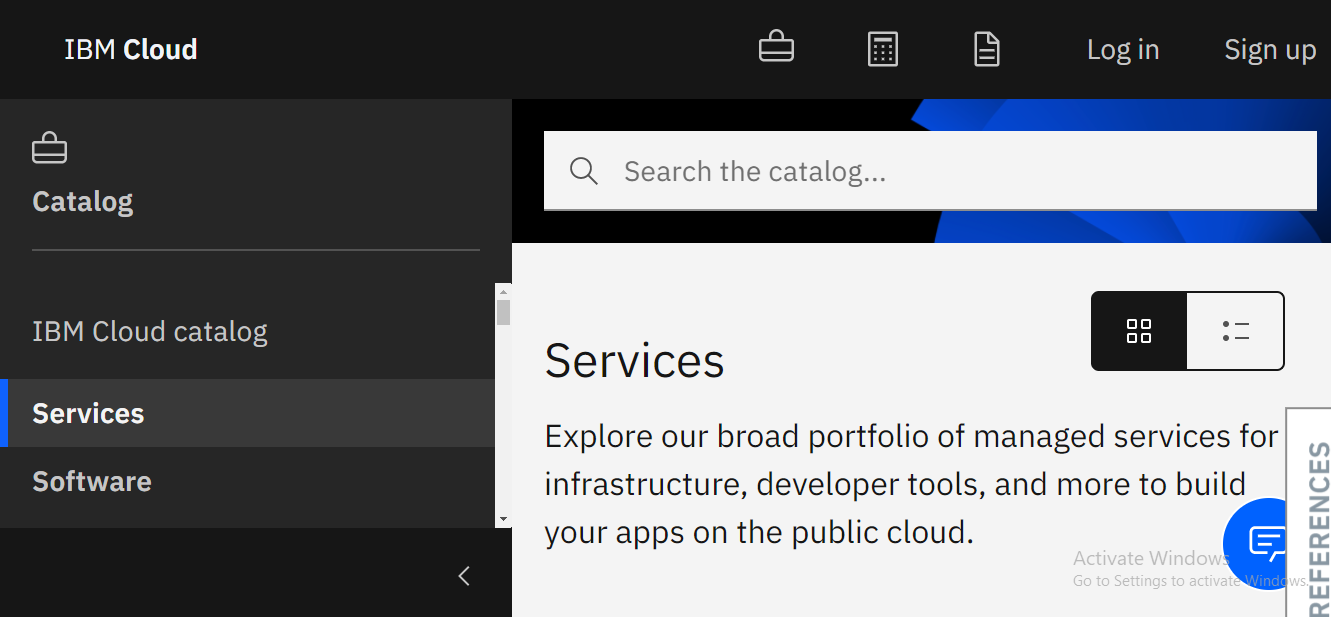
"Second": You click on the Services link, once you do that you will see a drop-down menu called category which lists all of the service categories offered by IBM Watson
Below is a picture of the services link
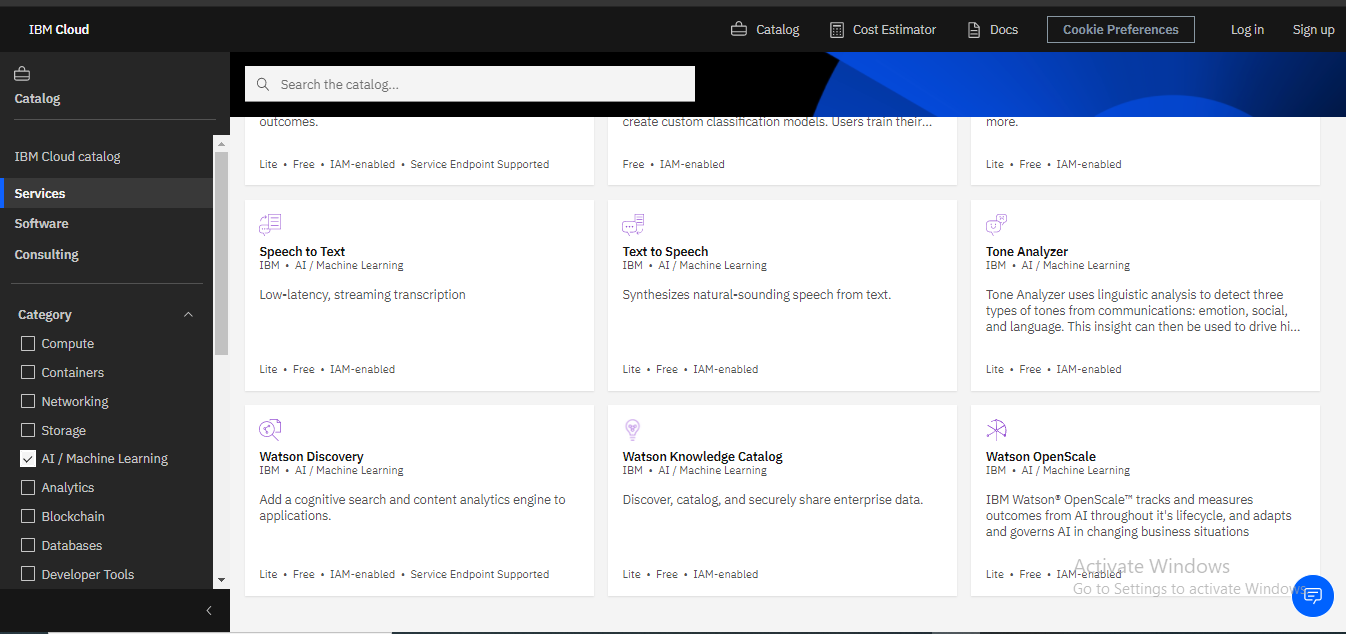
Below is a picture showing the services categories
"Third": In the category drop down you will see a lot of services like Compute, Containers, Networking, Storage etc. Click on the AI and Machine Learning link.
Below is a picture showing the AI and Machine Learning link box under the categories dropdown

"Fourth": Once you click on the AI and Machine Learning link you will then be given a Catalog of Watson's AI and Machine Learning services
Below is a picture showing the AI and ML services page of IBM Watson

"Fifth": Amongst the services offered in the AI and Machine Learning category you will see services such as Watson Assistant, Watson Studio, Knowledge Studio, etc click on the Text to Speech service.
Below is a picture of the text to speech service in the AI and Machine Learning category
"Sixth:" Once you have clicked on the text to speech service you will be taken to the page displayed below 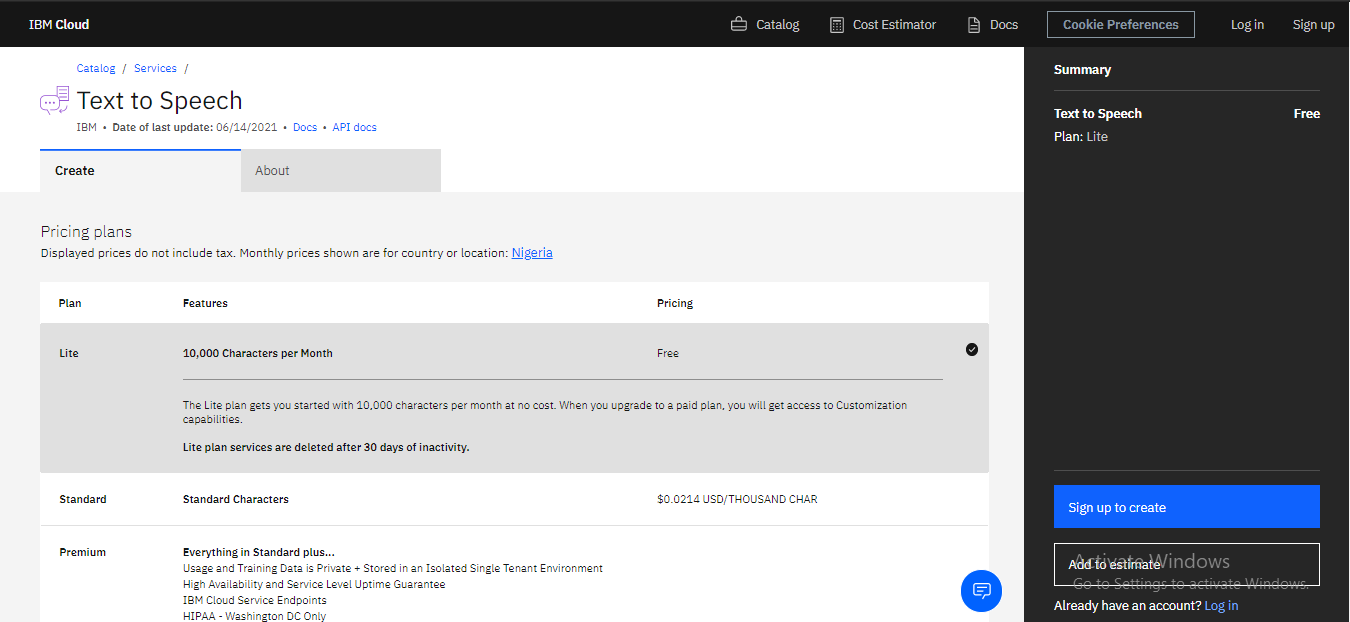
Now I'm going to assume you have an IBMID but if you do not click here to get one.
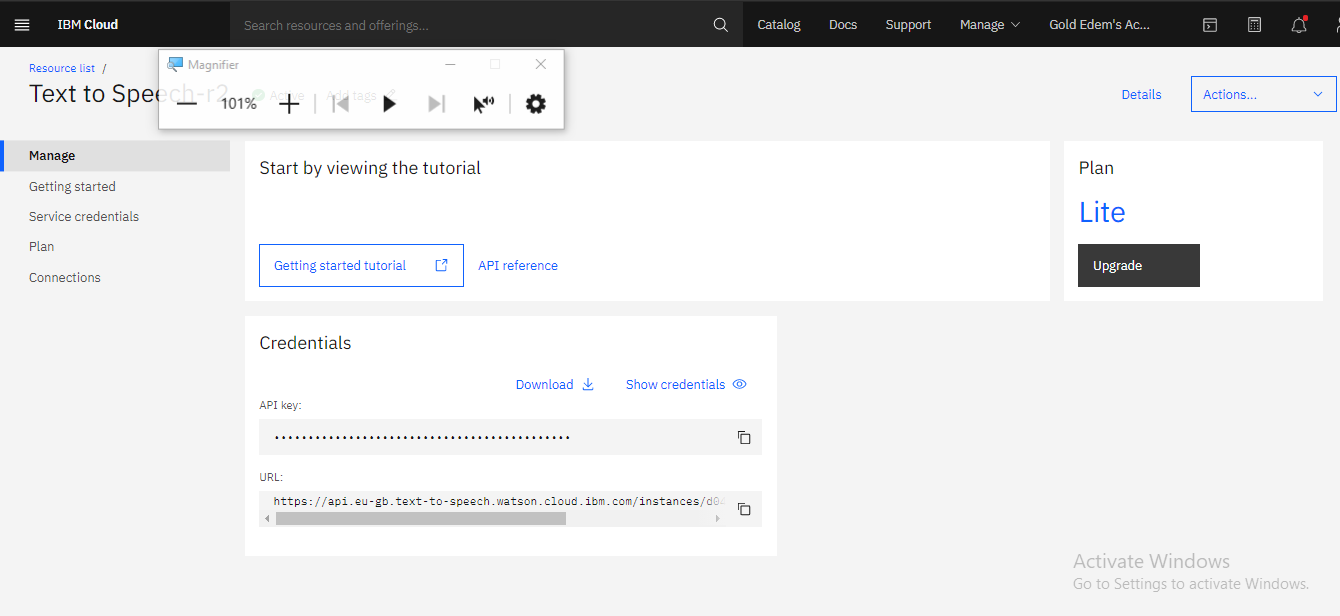
Now you have an IBMID you click on the log in link located at the top right corner of the page displayed below.
Once you log in you will see a blue button with create on it click on it you will be taken to the page displayed below where you will be shown your API key and URL
 Congratulations you have gotten access to the IBM Watson Text to Speech API.
Now that we have gotten access to our API let's
Get building
Before we get to building, if you at any point in the article get confused take a look at the project's code in its GitHub repository by clicking here
Project Flow
Below is the flow which the project is going to take
Install Dependencies:Here we are going to install the necessary python packages needed to use the API.
Authenticate:Here we are going to provide our API credentials and link to the API.
Convert String:Here we are going to transform simple words into spoken words!!
Convert a File:Here we are going to transform a whole text file into spoken words!!
Using new Language Models:Here we are going to transform the text into different languages!!
Let us begin
Install dependencies
I am assuming you have python, pip and a text editor or jupyter notebooks installed.
If you have the above-listed let's begin, to make use of the IBM Text-to-Speech API we are going to install the IBM-Watson library, by typing in the command listed below in your terminal or command line.
pip install ibm-watson
If you are using the jupyter notebook environment you can put down the command listed below in a cell.
!pip install ibm-watson
If you are done installing then you can move on to the next step.
Authenticate
In this section, we are going to link to the IBM Watson Text-to-speech API.
To begin we are going to put in the URL and the API key given to us on the Text-to-service page.
Below is a picture showing the page containing the API key and the URL
url = 'https://api.eu-gb.text-to-speech.watson.cloud.ibm.com/instances/d04b5ea5-e6b9-4'

apikey = 'McPLvaUHWywOhceFBH4inrgnvirrwoomckw[omlap'

#I have used a fake url and apikey.
Now we are going to import the necessary tools
from ibm_watson import TextToSpeechV1

from ibm_cloud_sdk_core.authenticators import IAMAuthenticator
Next we are going to set up our text-to-speech service
#setup service
authenticator = IAMAuthenticator(apikey)
#tts service
tts = TextToSpeechV1(authenticator=authenticator)
#service url
tts.set_service_url(url)
Now we have successfully authenticated and set up our service, next up we are going to...
Convert a String
Here we are going to turn the string (words) hello world (why hello world? why not?😏) into voice and turn and save it to an mp3 file so you can play it over and over again
with open('./speech_string.mp3','wb') as audio_file:
    res = tts.synthesize('Hello World', accept='audio/mp3', voice='en-US_AllisonV3Voice').get_result()
    audio_file.write(res.content)
In the above code, we opened a file named speech_string.mp3(I'm bad at naming things😢) and then we synthesized the sentence hello world into speech using a female US voice called Allison, (IBM Watson has a lot of different voices and languages, we will get to how you can make speech with all of them when we get to the using new language models section) Now you can go to your project folder where you will see an mp3 file named speech_string.mp3 play it and you will hear the words hello word spoken.
Now you've seen the power of the IBM Watson Text-to-Speech API against words, let's see if it can...
Convert a File
Here we are going to transform a whole text file into spoken words.
First, we are going to create a text file and name it text_file, and then we are going to type stuff into it. But it shouldn't make it too large because as lite users the API won't let us synthesize large text files.
with open('text_file.txt','r') as text_file:
    text = text_file.readlines()
In the code above we have opened the text file called text_file, read the text inside the file and named the text gotten from the file with the variable name text.
Now to see the text you have read from text_file, just run the variable text
text
Now you will notice that your code contains \n and they are used to show a new line in the text read, they are used for clarification. But unfortunately, it won't help clarify anything for our code so we are going to remove them.
text = [line.replace('\n', '') for line in text]

text = ''.join(str(line)for line in text)
In the code above we replaced all the \n notations and replaced them with an empty string and then we looped the replacement for every line in the text so now you can recheck your text file.
#to check for the replacement of \n

text
Now we have cleaned up our text we are going to turn the text into speech and save it inside a .mp3 file which we will call speech_file.
with open('./speech_file.mp3', 'wb') as audio_file:
    res = tts.synthesize(text, accept='audio/mp3', voice='en-US_KevinV3Voice').get_result()
    audio_file.write(res.content)
The code might take some time to load compared to when we were working with only a sentence, because of the increase in the number of words. Now go to your root folder and search for an audio file called speech_file.mp3 and you will find all the text you had in the text file read out to you
We have been able to turn a sentence into speech, we have also been able to an entire text file into speech now we are going to look at making speech in different languages using...
Language Models
In this section, we are going to look at how to make speech in French and other languages. To make speech in other languages all we have to do is change the voices, to show that I'll resynthesize our earlier text file into french
#converting to new language(french)
with open('./speech_file(french).mp3', 'wb') as audio_file:
    res = tts.synthesize(text, accept='audio/mp3', voice='fr-FR_ReneeV3Voice').get_result()
    audio_file.write(res.content)
As you can see above the only difference between the code snippet and the one we did earlier is the difference in voice name, for the one above we used en-US_KevinV3Voice while for this one we used fr-FR_ReneeV3Voice
To see proof of this go to your project folder and look for speech_file(french).mp3 and play it, you should hear the same speech but this time in french.
So in summary to synthesize speech in different languages all you have to do is change the voice.
To get a complete set of voices available for the IBM Watson Text-to-Speech service click here .
You can also check out the comprehensive IBM Watson Text-to-Speech docs by clicking here.


